| Home » Categories » Multiple Categories |
How To Use WP-CLI to Manage your WordPress Site from the Command Line |
|
Article Number: 292 | Rating: Unrated | Last Updated: Tue, Sep 23, 2025 at 11:00 PM
|
WordPress is an extremely popular blogging and Content Management System (CMS) used by millions of websites. It can be used to easily organize, manage, and create content on the web and handle interactions with visitors and contributors. Although most people use WordPress for its graphical interface, there are benefits to being able to control the software from the command line. A tool called This aids in scripting and allows you to manage your all aspects of the site, from configuration files and database management to posting, theming, uploading media and approving comments, from one place. In this guide, we will use the wp-cli interface to manage our WordPress installation. How To Install WP-CLIThis guide assumes that you have created a server using the WordPress application image from the creation page. If you need assistance doing this. When you have finished deploying, SSH into the server as the root user: ssh root@server_ip_address You should be in the root user's home directory. The first thing we need to do is install Next, we can get the installer and run it with this command, taken from the project's website: This will install a few tools needed to make the software function correctly. Next, we will create a In this file, put the following two lines: Save and close the file. Now, we can "source" the file (re-read it into our environment), to apply our changes: Now, we have the interface installed and we can begin using it. Change to the WordPress web directory to begin. On the one-click installation, that is here: Install Site with WP-CLIIf this is a completely new server instance, then you have not even completed the basic configuration. If you have gone through the site initialization process already, feel free to skip this step. If you type in Youcouldinitialize the site by going to your IP address or domain name in your web browser and filling out a form that looks like this:
However, since this is a guide on how to use wp-cli, we will fill out all of this information in a single command. We do this by doing the core installation. We will have to pass as parameters all of the fields that are asked for on that page. This is done in the following general format: --parameter="value" The parameters that we need to define are:
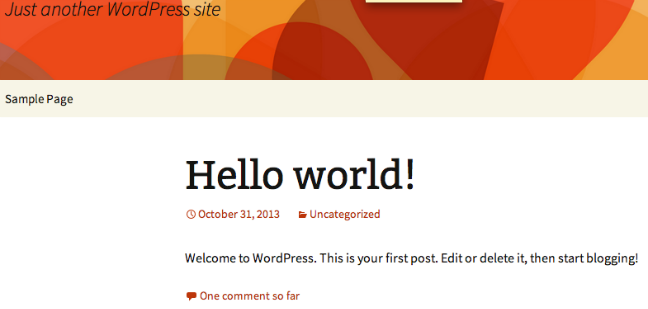
We add these after the wp core install --url="your_domain_name" --title="Your Blog Title" --admin_user="admin" --admin_password="your_password" --admin_email="your_email" This process may take a bit of time to configure all of the necessary components. When it completes, you should see a line that says: If we visit our site in a browser, we should see the default WordPress site:
How To Use the WP-CLI Help SystemAlthough wp-cli does not include a traditional You can see all of the top-level sub-commands that wp-cli uses to manipulate different areas of WordPress. To exit, type: This first level is perhaps best viewed by typing You can then use the help system to query aboutspecificsub-commands: As you can see, each of these sub-commands has itsownsub-commands. The help system operates the entire way down the command structure: In this way, you can get help with just about any aspect of the system that you wish to use. How To Install Themes with WP-CLITo demonstrate some basic usage of wp-cli, we will do one of the first things that anybody does when they create a new blog: get a new theme. First let's see what themes we have installed already: As you can see, we have two themes installed, and we are currently using one called "twentythirteen". This is fine, but it's a bit boring. Let's search for something more exciting: We can see that there are 5 themes that claim to be fancy. "Bold Headline" seems pretty exciting and has a good rating. Let's get that one. Use the string in the If we check again, we can see that it was installed successfully: We can activate our new theme by typing: Now, if we visit our site, we can see that our new theme has been applied:
This looks pretty good! How To Manage Plugins with WP-CLIYou can manage plugins in a similar way to themes. They have many of the same sub-commands: We have two themes installed, but neither are active. Let's get a plugin that can urge users to share content on social media sites. There's a plugin called Digg-Digg that is known for this: We can see a few different alternatives. Let's actually switch it up and install the "aas-digg-digg-alternative" plugin instead. Again, reference the plugin through the slug name: We can activate the plugin by typing: We can see the results by visiting one of our posts:
How To Manage Content with WP-CLIIf you are comfortable composing posts with a command-line editor, you can make entire blog posts through the wp-cli interface. To get a list of the posts on your blog, type: Right now, there's only the default message. Instead of deleting this post, let's edit it to be something more useful. We reference the post by its ID: Delete the content and replace it with: When you save and close the file, the changes will be live. We should also change the title to match our new content: You can see your new content by revisiting your blog:
We can add a completely new post by typing something like this: This will open an editor where we can type our second post: How To Do Database Queries with WP-CLIOne of the most useful features of wp-cli is integration with the SQL backend. You can get right into the WordPress database in an interactive session by typing: This will give you a MySQL prompt, which you can use to do any sort of database administration required. You can exit the interface by typing: For most common database operations though, you control it directly from the wp-cli interface. To query our users and their associated IDs, we can use something like: As you can see, we only have one user. We can use this information though to update the post we just made. Let's add an author field to our post. Be sure to get the post ID you wish to update: Now, our post should have an author listed as "admin" beside our content. We can optimize our database by typing: How To Update WordPress with WP-CLIWe can keep WordPress up-to-date by performing the following procedures: More importantly, we can update our plugins, which have a tendency to be a weak link in WordPress security, by typing: ConclusionYou should now have a pretty good handle on how to complete tasks in WordPress through the command line. This is not only a fast and easy way to manage multiple sites for different clients, it also provides very nice scripting capabilities to do very complex tasks easily. By effectively using wp-cli, you will no longer have to continually switch between the web browser and the terminal window when doing changes that might not be available from within the web interface. |
Attachments

There are no attachments for this article.
|
Related Articles 
How To Install Apache Tomcat on Ubuntu 12.04
Viewed 4264 times since Mon, Dec 23, 2013
How To Install Linux, Nginx, MySQL, PHP (LEMP) Stack on Debian 7
Viewed 4360 times since Fri, Dec 27, 2013
How To Install Linux, Apache, MySQL, PHP (LAMP) stack on Ubuntu
Viewed 7157 times since Thu, Jan 2, 2014
How To Protect SSH with fail2ban on CentOS 6
Viewed 3127 times since Tue, Dec 31, 2013
How To Set Up an NFS Mount on Ubuntu 12.04
Viewed 11000 times since Tue, Dec 24, 2013
How To Create Nagios Plugins With Perl On Ubuntu 12.10
Viewed 2749 times since Sat, Jan 4, 2014
How to Add a Swap File on an Arch Linux Cloud Server
Viewed 3214 times since Fri, Dec 27, 2013
How To Use Top, Netstat, Du, & Other Tools to Monitor Server Resources
Viewed 7341 times since Sat, Jan 4, 2014
How To Copy Files With Rsync Over SSH
Viewed 6977 times since Fri, Dec 27, 2013
How To Use HAProxy to Set Up MySQL Load Balancing
Viewed 8677 times since Thu, Dec 26, 2013
|


 Subscribe to Article
 Print Article
-
 Email Article to Friend
 Export to PDF
 Export to MS Word
 Tweet This Article
 Digg It
 Stumble Upon
 Del.icio.us