| Home » Categories » Multiple Categories |
How To Change Themes and Adjust Settings in Ghost |
|
Article Number: 179 | Rating: Unrated | Last Updated: Tue, Sep 23, 2025 at 11:33 PM
|
Ghost is a great new blogging platform that focuses on content creation and presentation over the superfluous bells and whistles that dominate other platforms. It provides a clean, easy-to-use interface and can produce very polished results. How To Change Ghost ThemesThe main aesthetic adjustment that you can make to your blog is the theme. A theme controls how all of the pieces are presented visually and how the elements are drawn together. There are a number of different themes you can get for Ghost. Some are free and some you must purchase. We will apply one of the free themes from the Ghost Marketplace called "N'Coded". You can see this theme by visiting: Click on the "N'Coded" theme to be taken to the theme's GitHub page. Log into your Ghost and navigate to the Ghost themes directory: We will use git to install the theme into this directory. Install git if it is not already present in the system: Now, we can clone the project from the GitHub page: Change ownership of the files to the Ghost user and group: Restart Ghost to allow it to see the new theme folder: Open your web browser and navigate to the general settings page: your_domain_name/ghost/settings/general Scroll down to the bottom and you will see a "Theme" area. Change the theme to "N-Coded":
Click the "Save" button in the upper right corner. Navigate to your blog to see the new theme:
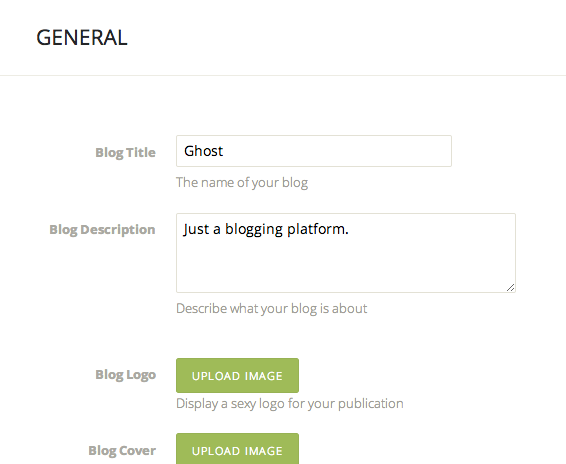
How To Change Ghost SettingsYou can change most of your blog's settings by navigating to the "settings" page of your blog: your_domain_name/ghost/settings You will be taken to the general settings page:
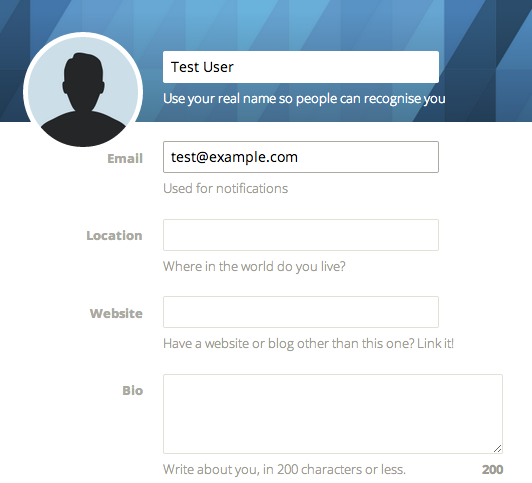
Here, you can adjust items like the title and description of your blog, and update the logo and cover images. To change details for your user, click on the "User" tab on the left-hand side:
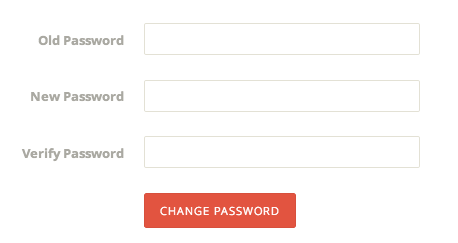
Here, you can adjust settings for your profile. These details include your user name and email, as well as a short biography and a link to a personal external site. If you scroll to the bottom of the page, you can change your personal password by typing in your current password and supplying/confirming a replacement:
ConclusionGhost helps you stay focused on your content by removing the distractions present in other blogging platforms. You should now be able to start generating content and adjust themes and the most common settings. Explore the interface and practice using the system to manage your ideas. Publish some posts and create some drafts without publishing to see how Ghost organizes those pieces. The more you play around, the more comfortable you will be using the platform on a daily basis. |
Attachments

There are no attachments for this article.
|
Related Articles 
The Basics of Using the Sed Stream Editor to Manipulate Text in Linux
Viewed 7152 times since Fri, Dec 27, 2013
How To Use WP-CLI to Manage your WordPress Site from the Command Line
Viewed 10948 times since Sat, Jan 4, 2014
How To Create Nagios Plugins With PHP On Ubuntu 12.10
Viewed 2991 times since Sat, Jan 4, 2014
How To Set Up SSH Keys
Viewed 4027 times since Thu, Dec 26, 2013
Intermediate Sed: Manipulating Streams of Text in a Linux Environment
Viewed 10985 times since Fri, Dec 27, 2013
What is FTP and How Is It Used?
Viewed 3053 times since Fri, Dec 27, 2013
How To Use Top, Netstat, Du, & Other Tools to Monitor Server Resources
Viewed 7531 times since Sat, Jan 4, 2014
How To Copy Files With Rsync Over SSH
Viewed 7137 times since Fri, Dec 27, 2013
How To Create Nagios Plugins With Perl On Ubuntu 12.10
Viewed 2884 times since Sat, Jan 4, 2014
How To Protect SSH with fail2ban on CentOS 6
Viewed 3252 times since Tue, Dec 31, 2013
|


 Subscribe to Article
 Print Article
-
 Email Article to Friend
 Export to PDF
 Export to MS Word
 Tweet This Article
 Digg It
 Stumble Upon
 Del.icio.us