| Home » Categories » Multiple Categories |
How To Configure Secure Updates and Installations in WordPress on Ubuntu |
|
Article Number: 293 | Rating: Unrated | Last Updated: Tue, Sep 23, 2025 at 11:00 PM
|
WordPress is the most popular CMS (content management system) used on the internet today. While many people use it because it is powerful and simple, sometimes people make a trade-off for convenience at the expense of security. This is the case in how you choose to assign directory ownership and permissions, and how you choose to perform upgrades. There are a variety of different methods to do this. We will choose what we consider a relatively secure way of upgrading and installing themes and plugins. In this guide, we assume that you have gone through your initial server setup. You will also need to install a LAMP stack on your server. We will also assume that you have installed WordPress on Ubuntu 12.04. You can follow our guide on how to install WordPress on Ubuntu 12.04. Once you have the user and required software, you can start following this guide. Set Up Secure Updates with SSHIf you do not have key-based updates and installations configured, you will get a prompt for connection information whenever you attempt to do either of these tasks. It will ask you to provide FTP credentials, such as a hostname, FTP username, and FTP password:
FTP is an inherently insecure protocol, so we do not recommend you using it in most cases. We will be configuring our installation to use a secure alternative. Changing PermissionsIf you followed the guide on installing WordPress above, you will notice that you gave permission of the web directory to the Apache web user. This is a very quick way to get started, but can potentially be a security risk. In an ideal situation, you would separate the content owner from the web process. We will do this as part of our preparation for allowing SSH updates. We will create a user called You will be asked a lot of question, including the password you want to set. We do not want to set a password, so press "ENTER" through all of the prompts, including the repeated password questions. Next, change to the We will give our new user ownership over everything under this directory, changing it from the Create SSH Keys for WordPressWe now need to create an SSH key pair for our WordPress user. Log into the WordPress user by issuing the following command: We will create a key pair with the You will be asked where to store your keys and what to call them. Choose Exit out into your normal user account: We need to do some maintenance to get the permissions secure. We want to give the WordPress user ownership, but set the You need to create the Now, we can input the public key into our authorized keys file so that the user can log in using those credentials. Since we do not have this file already, we can simply copy the public key. Again, we need to adjust the permissions and ownership of these files to ensure that they can be accessed, while remaining secure: Since these keys will only be used for logging in from within the WordPress site, which is on the same computer, we can restrict the login to this server: At the very beginning of the file, before any of the other text, add the portion in red to restrict the key usage to the local computer: from="127.0.0.1" ssh-rsa... Save and close the file. Adjust WordPress Configuration to Use KeysNow, we can install the packages necessary for WordPress to authenticate SSH logins: Now that we have the utilities, we can edit the configuration file and set the values that we configured. Towards the end of the file, add these lines: Save and close the file. Now, we should restart Apache to take advantage of our new update procedures: Test the ResultsNow, we can test to see if our configuration is correct. Log into your WordPress site as an administrator by visiting your site in a browser at the following URL: your_domain.com/wp-admin We can check that our settings are configured correctly by attempting to install a new theme. Click on "Appearance" and then "Themes".
At the top, click on "Install Themes":
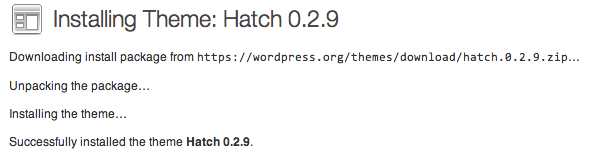
Search for a theme or click on the "Featured" themes. Click "Install" to install the theme on your site. It should successfully log in, download, and install your package using the key files you specified:
You can click on "Activate" to switch to the new theme and then click "visit site" to see the results. Common IssuesThere are some issues that you may run into if you've configured your SSH keys incorrectly. One common error that you may see when trying to push a change through the web interface is: Public and Private keys incorrect for user This error is frustratingly unspecific. It can be caused for a variety of reasons, some of which are:
Another common error during the process of updating or installing themes and plugins is: This is usually an issue with incorrect web-directory ownership. If you are going to be updating the files with the This means that you need to give the files and folders within the Another thing to check is that the upload directories have write permissions for the WordPress user. Change to the document root: If we check the permissions of the files in this folder, we should see write permissions for the owner (first column), but not for the second or third columns: As you can see, the file permissions that read A similar check within the These directories are correctly configured. ConclusionWhile WordPress is convenient and can be configured and managed relatively easily, it does not mean that security should not be a primary concern for your site. Something as simple as updating your installation, which should be done immediately upon any security release, should be simple. It also should not be a procedure that forces you to use insecure protocols or set insecure directory permissions. Securing your update procedure and correct directory permissions is one easy task that can prevent a rather large security concern. |
Attachments

There are no attachments for this article.
|
Related Articles 
How To Use Top, Netstat, Du, & Other Tools to Monitor Server Resources
Viewed 7375 times since Sat, Jan 4, 2014
How To Setup Your Own VPN With PPTP
Viewed 3723 times since Thu, Jan 2, 2014
How To Install and Secure phpMyAdmin on Ubuntu 12.04
Viewed 3427 times since Mon, Dec 23, 2013
An Introduction to Linux Basics
Viewed 6988 times since Fri, Dec 27, 2013
How To Create Nagios Plugins With Perl On Ubuntu 12.10
Viewed 2771 times since Sat, Jan 4, 2014
How To Install and Configure Django with Postgres, Nginx, and Gunicorn
Viewed 4838 times since Fri, Jan 3, 2014
How To Install Apache Tomcat on Ubuntu 12.04
Viewed 4295 times since Mon, Dec 23, 2013
Installing and Using the Vim Text Editor on a Cloud Server
Viewed 3086 times since Fri, Dec 27, 2013
How To Change Themes and Adjust Settings in Ghost
Viewed 4752 times since Thu, Dec 26, 2013
How To Install MongoDB on Ubuntu 12.04
Viewed 3294 times since Mon, Dec 23, 2013
|


 Subscribe to Article
 Print Article
-
 Email Article to Friend
 Export to PDF
 Export to MS Word
 Tweet This Article
 Digg It
 Stumble Upon
 Del.icio.us